Lifelines in Knitting
Lifelines in knitting are a valuable tool that can help you when working on complex or intricate patterns. They provide a safety net by allowing you to easily go back to a specific point in your knitting if you make a mistake or need to undo your work. Here's how you can use lifelines in knitting:
-
Choose the right material: Lifelines can be made from various materials, such as a smooth contrasting yarn, dental floss, or even thin cotton thread. The important thing is that the material is strong enough to hold your stitches without breaking or snagging.
-
Select the right moment: Decide when to insert a lifeline based on your project and your comfort level. It's generally a good idea to insert a lifeline after completing a section or a complex pattern repeat.
-
Prepare your lifeline: Cut a piece of your chosen material that is longer than the width of your knitting project. Thread it onto a blunt-end yarn needle or a large-eyed sewing needle.
-
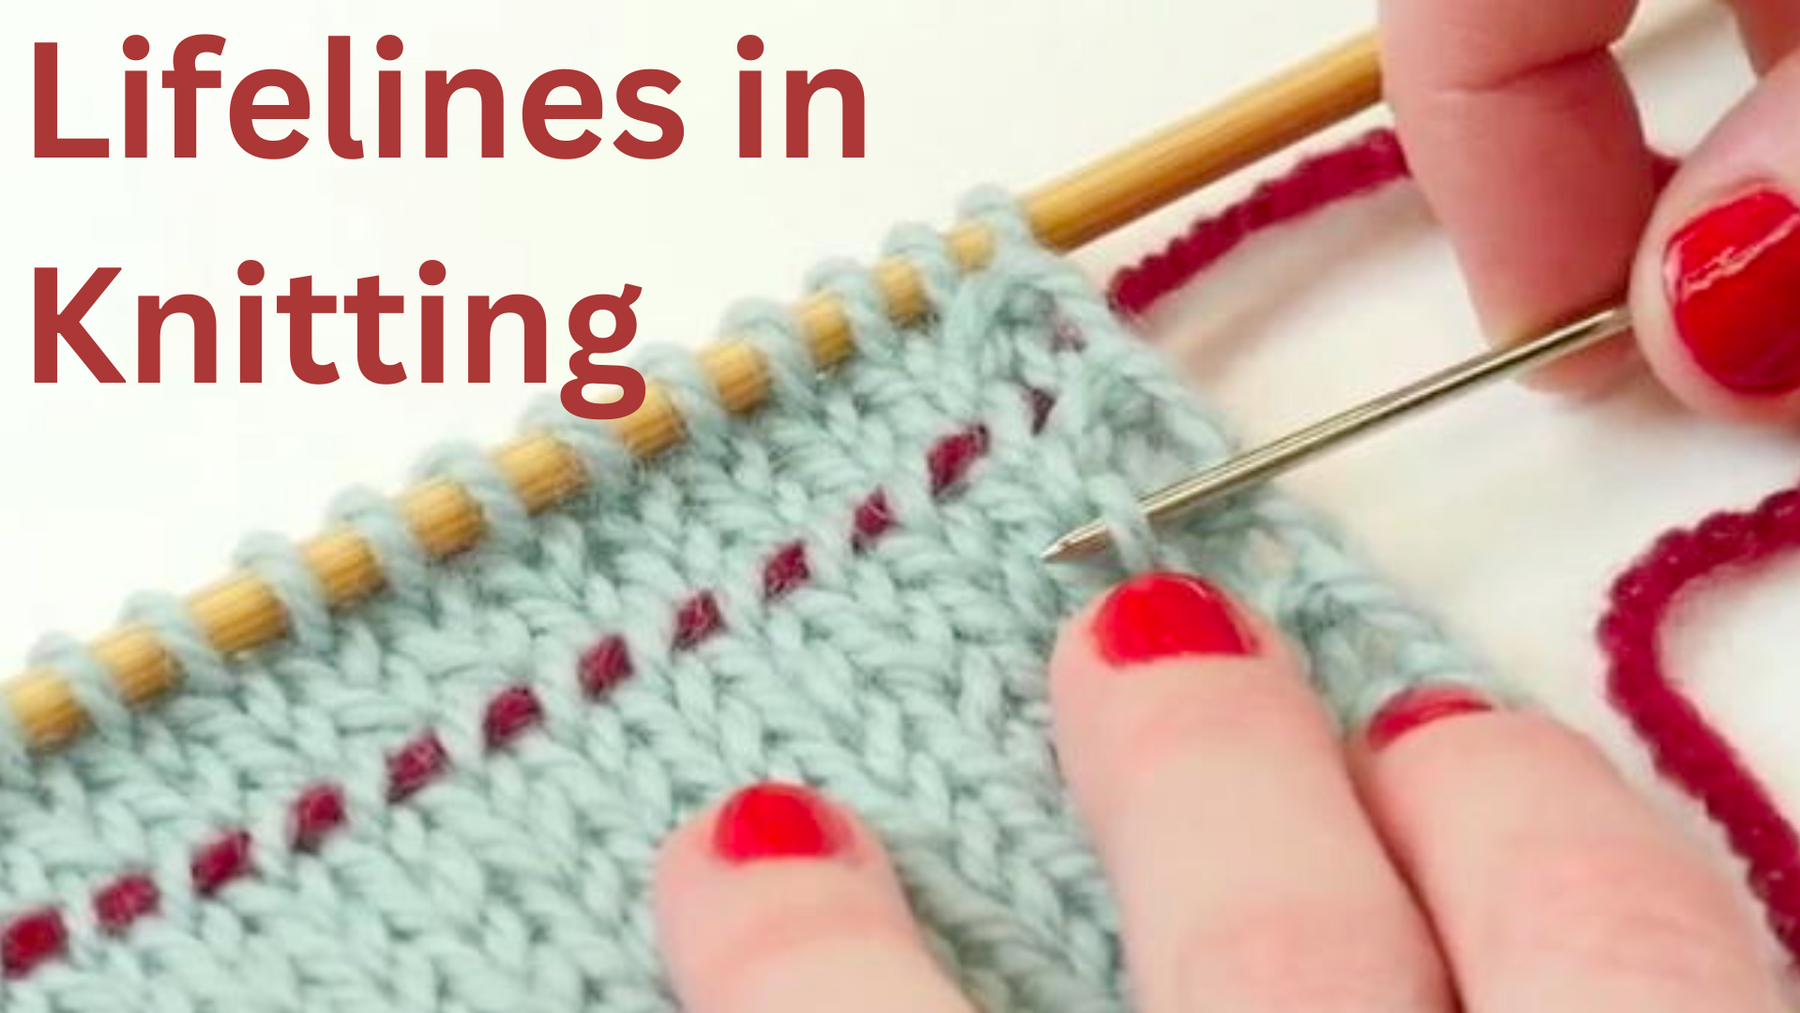
Insert the lifeline: With your knitting on the needles, take the threaded needle and carefully weave it through the live stitches on your knitting needle. Insert the needle through the center of each stitch, making sure not to split the yarn. Continue threading the lifeline through all the stitches on your needle until it reaches the other end.
-
Secure the lifeline: Once the lifeline is threaded through all the stitches, gently tug on both ends to ensure it is snug but not tight. Make sure the lifeline doesn't pull the stitches out of shape. You can tie the ends of the lifeline together in a loose knot to prevent it from unraveling.
-
Continue knitting: Resume working on your project as usual, knitting over the lifeline. The lifeline will run through the center of your stitches and be virtually invisible, so it won't interfere with your knitting.
-
Troubleshooting and using the lifeline: If you make a mistake, or need to undo your work, simply unravel your knitting back to the lifeline row. Since the lifeline is secure, your stitches will not unravel beyond that point. You can then place the live stitches back onto your knitting needle one by one, making sure they are correctly oriented, and continue knitting from there.
-
Removing the lifeline: Once you're confident in your progress and no longer need the lifeline, you can remove it. Simply take your knitting needle and carefully slide it out of each stitch, ensuring you don't accidentally drop any stitches. The lifeline should come out smoothly, leaving your knitting intact.
By using lifelines, you can gain peace of mind while tackling challenging knitting projects, knowing that you have a reliable way to correct mistakes and avoid having to rip back your entire work.
This great video by Sheep & Stitch shows examples of lifelines and how they can be used in your knitting projects.
Comments
Leave a comment